August is when I prepare for another trip back to Burning Man. Despite the complicated logistics, endless details and physical challenges of photographing in the intense heat and alkaline dust, I am drawn to return again.
.
When I post my Burning Man photo galleries after each event, many people ask me for details on how I photograph there, and how I protect my gear (and myself) in such conditions. They also ask what gear I use, so I have also embedded links to the products I’ve found work best for me. Watermarks are here only to thwart re-posting without loss of origin.

Crowds gather brightly to see the man burn on Saturday night. (Composite of three frames from a lift: Fuji X-T2 35mm )
A LITTLE BACKGROUND:
Burning Man is the world’s largest festival dedicated to creative expression, attracting around 70,000 people from all over the world. The location is a temporary seven square mile city built deep in the Black Rock Desert on a dry lake bed called the playa. Temperatures there can range from the 40’s at night and have reached over 106 degrees during the day. YRMV. Frequent gusts blow ultra fine alkaline talc known as Playa Dust into absolutely everything… for the duration. Mutant Vehicle art cars roam the playa day and night, often thumping danceable soundtracks while spewing huge jets of fire. Many of them are dance beacons, loaded with sound systems and lighting. People gather in camps or out on the playa to share all kinds of knowledge, dance, music, arts and best of all— themselves. Burning Man offers many avenues for interaction, participation, giving and learning. There have been TEDx talks and formal stages and galleries of artworks. The surreal visuals, light and spatial quality of the playa truly cannot be described in words. My photographs are my attempt to express the feel of the energy, scale and pure beauty of the event, and the ‘Burners’ I’ve met.
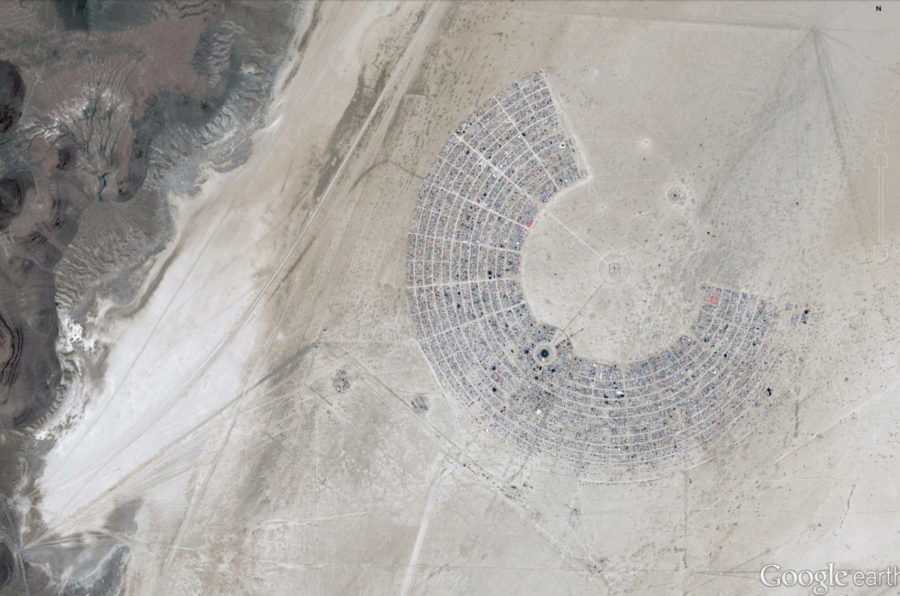
© Google Earth aerial of Burning Man, AKA Black Rock City
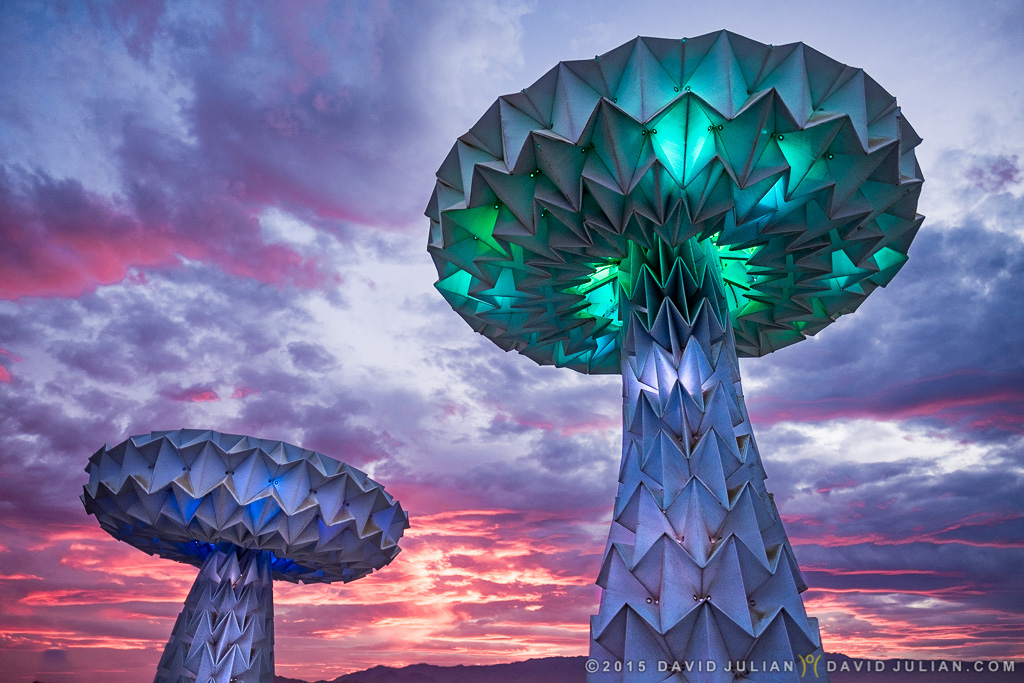
Shroomen Lumen, an interactive shape-shifting robotic installation by Foldhaus (Fuji X-T1, 16mm WR at f5.6)
BEFORE THE CLICK:
Before I can address anything regarding making photographs, I will point out that there are rules to be followed. “This ain’t Coachella bucko”. Buringman.org has rigid legal guidelines for recorded media made while attending the ‘private ticketed event’. Read the rules and etiquette section here and also media use before heading to the playa. Read all the literature that came with your ticket. Consult veteran ‘burners’, and photographers who have been at least twice. They can help guide you.
If you DO photograph people on the playa (and of course you will), be SURE to ask if it is OK to post them on the internet. If you do post the photos, resist editorializing their reality unless you know them, for example: “Joe Smith getting thrashed at Thunder Dome”. A lot of people do NOT want their experience plastered on social media. Also be SURE to credit whomever and whatever artwork is in the photo. This means taking the time to record this info, or research what’s in your photos. I open Apple Notes and speak or type the info into my iPhone. Back that info up onto another app as you won’t have cellular data for Apple iCloud to do it. I lost all of my info one year when my phone bricked in the heat. One last point: I do not photograph people’s ‘private’ moments or anyone grieving at the Temple without direct permission. Their experience there is likely emotional and very personal to them. I know it was for me each Burn.
OK, now on to the fun…
TECHNIQUE:
There is a lot of chatter on Social Media from veteran Burners about doing the Burn “right” or “all wrong”. It’s more snark than truth, and designed to poke fun and sometimes to confuse. But confusion can be good— as it forces you to use your instincts and form your own truths. Below are my ideas on doing it right– for me. I’m fairly obsessive (duh, really?) about my Burn prep and how I approach photographing the event. Take advice and then do it your way!
Photographing the art installations and Mutant Vehicles: Before even going to the event, I research the larger artworks being brought to the playa and try to map where they will be located. Once there, I bike out to check on many of them, and plan when they might be most photogenic by position in relation to the rising or setting sun. This works about half the time, because sometimes the artworks are surrounded by people when the light is optimal. When this happens, it can be helpful to use a tripod, ND filter and make a long exposure to blur most people out. I like to shoot with wide angle lenses because I like the distortion and including a lot of the background structures fading into the distance. I meter to preserve the highlights, so using the histogram to judge overexposure is essential. I am often on one knee, as I like to make my subjects appear more heroic by ‘looking up to them’ with the camera. Just be wary not to make feet and legs appear overly stretched out if using a very wide angle lens. The rest is artistic technique, sinking into the mood of the moment and letting intuition direct your bicycle to the next great shot. For the vehicles, I like to photograph them as the light gets low, or when the dust clouds create an unearthly aura around them. Avoid crossing in front of a moving art cars to get ‘the shot’. They often cannot see you. Ask the drivers to stop for a shot, or bike well ahead of them and shoot as they slowly roll by. Don’t be needy or entitled. YOU are a participant, not there just as an observing artist. Remember, Burning Man is a gifting opportunity, so email something to those in your photos after you return home.
Take as much time to be without your camera as you are with it. Participate in Burning Man fully, openly, completely. OK, I’m off my soap box.
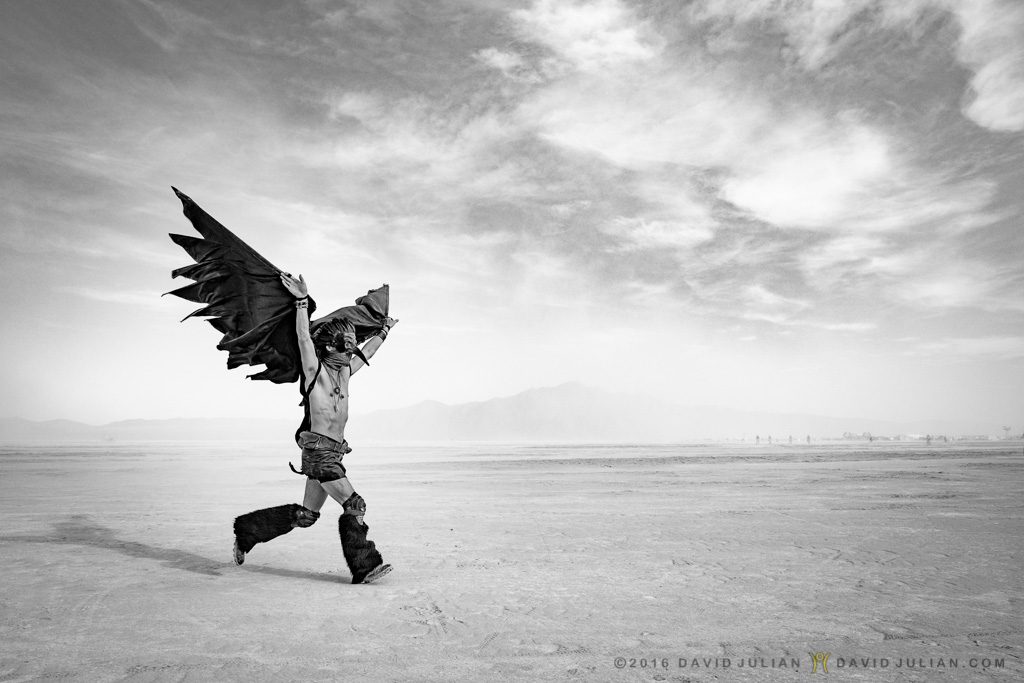
Photographing other burners: The overall rule is: Ask first or get a nod, especially if any nudity is involved. When I happen upon an interesting looking person, like the dancer below, I like to reposition myself for the ideal background. I drop to one knee a lot to bring the horizon higher. I may ask my subject, if they seem willing, to turn into the light, or shift position to prevent unwanted background elements from competing with them. I often get close in for dusty portraits. If the subject is not in a hurry, I’ll show them a sample flip book of my past Burn photos, or what I’ve just shot on the LCD back. I always try to get the email address of my subjects, and record that as an audio or video clip, snapshot, or using a model release app such as Releases. Choose an easy-to-use app, and that may mean spending a few $. In return for their allowed permission, I like to gift my subjects a printable processed HQ JPG via email.
I usually turn off my camera’s LCD entirely to save battery power, and very rarely review my shots or delete any in camera. Stay in the moment.
I keep a few empty formatted cards with me and download to my laptop once back in camp. I shoot RAW+Normal JPG because the Fuji camera can make a color RAW next to a B+W JPG and show me both side by side in Lightroom. Without a computer at BM, and with enough cards, you could shoot all week– especially in Fine JPG mode. Don’t plan on using Social Media while at Burning Man. You won’t have a signal and it takes you out of the moment. Speaking of that, I’ve had many well-meaning people say that photographers “miss being in the moment”. Not so. When I am out photographing, I am practicing being aware, examining, communicating, seeing, feeling… and totally being me. I’m just not talking a whole lot.
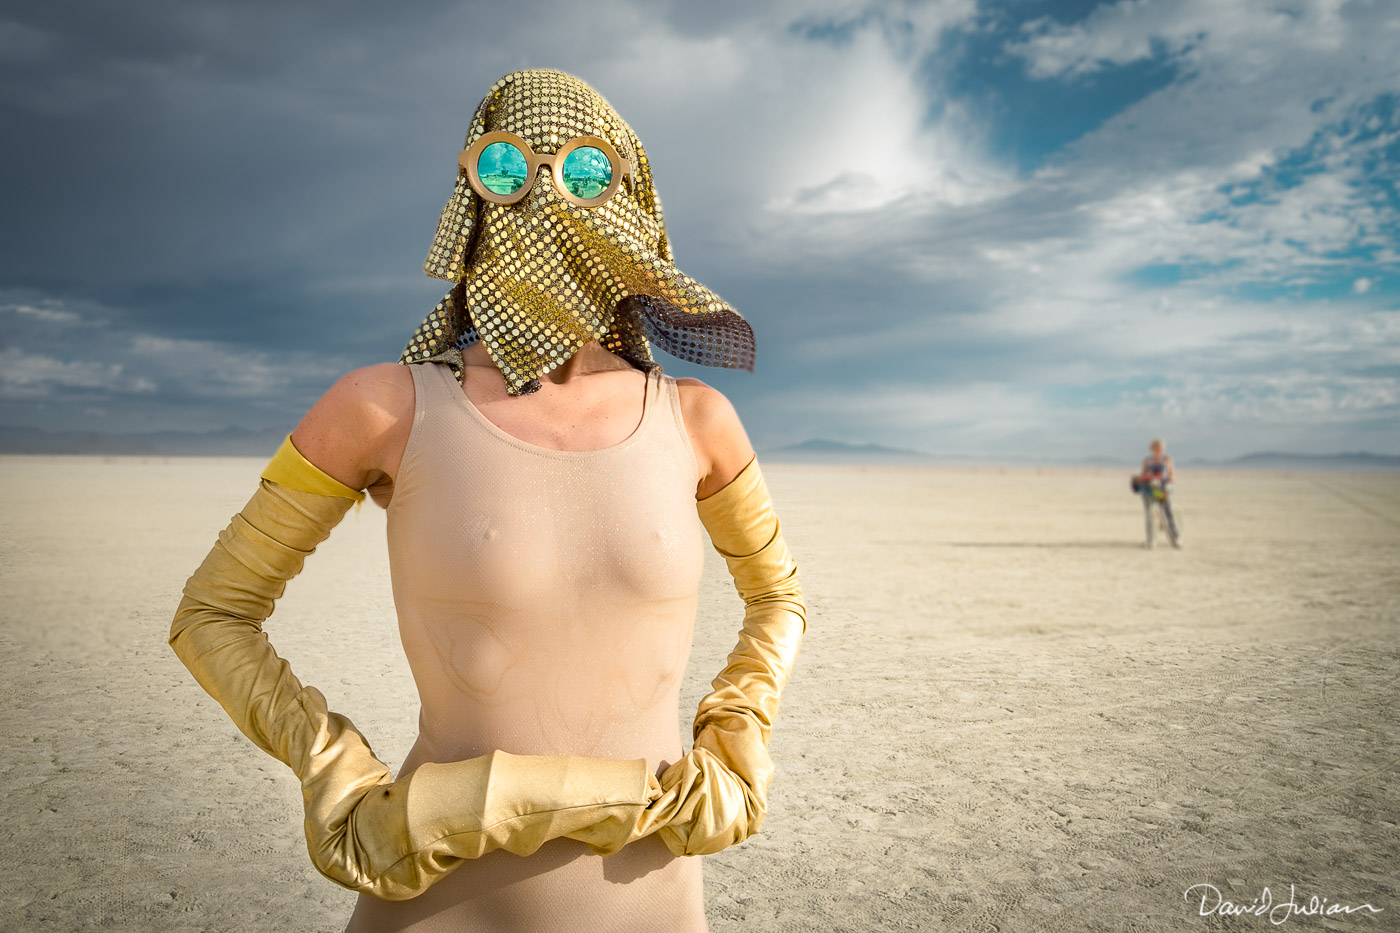
Dancer in Gold with Green Goggles (Fuji X-T1, 16mm WR at f5.6)
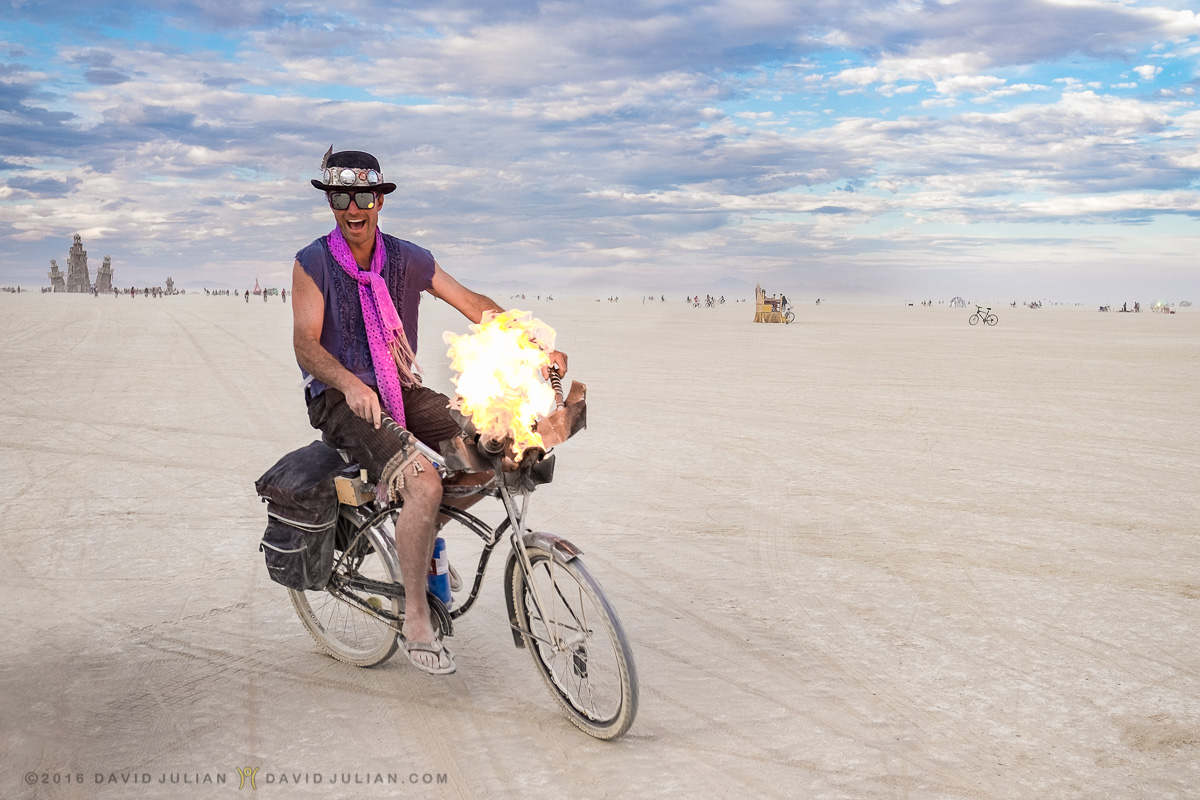
California burner Blake L. knows how to wrangle fire. (Fuji X-T1, 16mm WR f11)
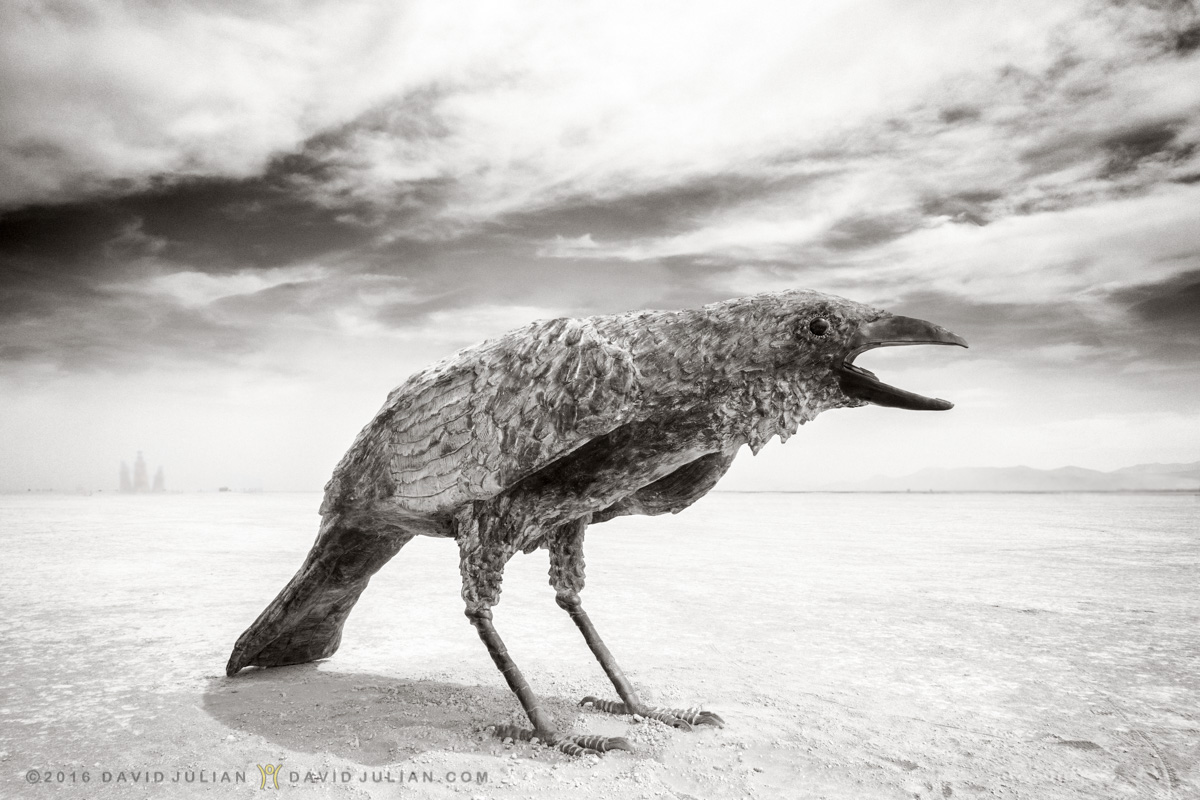
One fifth of Jack Champion’s fantastic installation of huge crows entitled ‘Murder of Crows’. (Fuji X-T1, 16mm, Acros film simulation)
GEAR:
I don’t take photographing ‘the burn’ lightly as I could. It is an annual opportunity to make my art in an extraordinary place. So, I set up my gear just as thoroughly as I would for a travel assignment or expedition. Many people bring a ‘beater’ digital camera to Burning Man, but I don’t. I take my best gear because I want the best image quality and performance, as well as solid weatherproofing. My main cameras are the a Fujifilm X-T line mirrorless bodies and a Sony RX100 IV that I’ve adapted for the playa. My advice for anyone bringing their only good dSLR or compact camera to the playa is to do some basic prep on it but also commit to using it without undue fear. There are some ideas below that may help keep your camera (and you) in sound condition. After each Burn, I take my gear in for a professional sensor cleaning. A trouble-free solution could be to bring a waterproof camera and a lens brush and live with a bit less image quality and no viewfinder. The pocketable dust and water proof Olympus TG-4 and TG-5 models are capable of fairly sharp RAW files, and zoom internally from 24-100mm. Either would be an ideal choice so long as you can see the LCD in such bright light. Personally, I prefer looking through the viewfinder but with goggles it can be hard to do.
To transport my Fuji camera when strapped across my body or stowed in my bike’s rear rack pack, it is sealed in an Osprey 6-liter nylon dry bag cinched up to the strap. I tried the Ziplock gallon freezer bag housing method as recommended by others online, but they wore out very quickly, created lots of dust-loving static, and the seals fouled up within hours. It became a dusty klusterfuck of plastic MOOP. That said, it may work well for a casual user. My hydration backpack carries my other lenses and cleaning gear. The Sony compact, a few batteries and extra SD cards live in a well-zippered Eagle Creek waist pack.
Here is a 2018 list of weather-sealed dSLRs. Keep in mind that the body seals on all dSLRs do not protect the lens mount nor the sensor. I’ve seen pro photographers dangling cameras completely spattered with playa as if covering a war, and others lovingly placing their cameras in foam-padded Pelican cases every time they mount their bikes. Know this: Everything will get playa dust on or in it, because even in the still of the night, it’s airborne. Befriend the dust, as once winter comes, you’ll miss the Playa!
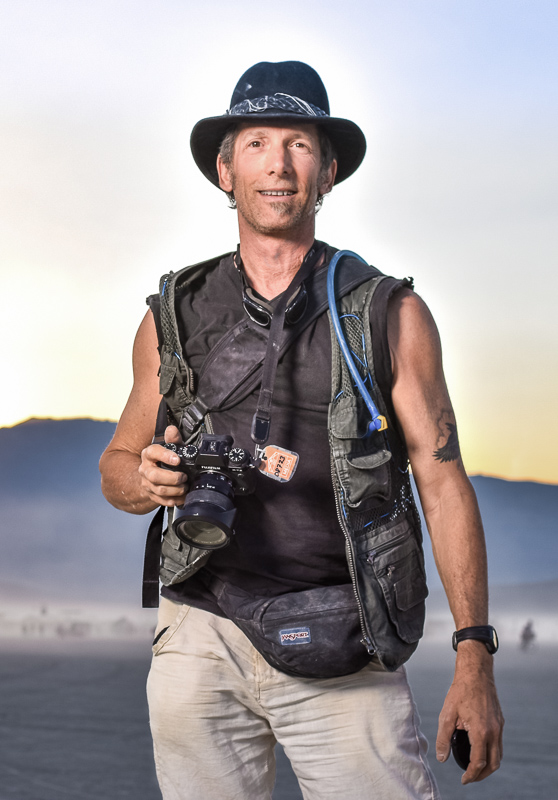
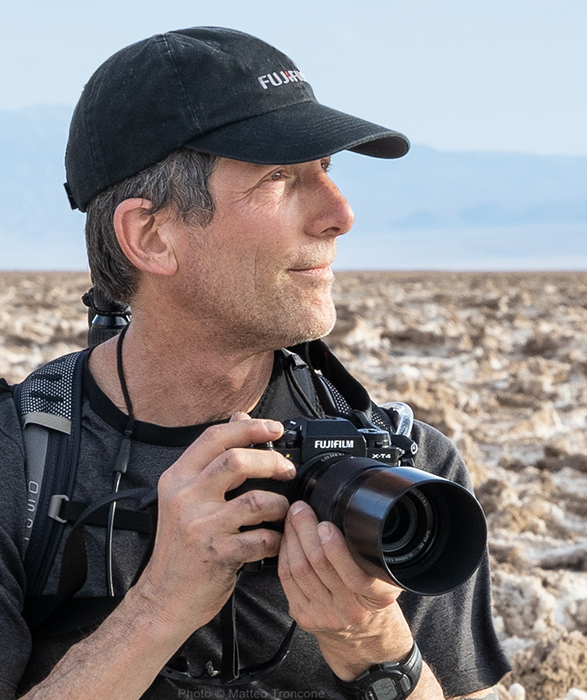
Me at Burning Man 2017. I met Allan Luke who set up a studio strobe setup making portraits of anyone who would stop. (Photograph © www.LukeStudios.com)
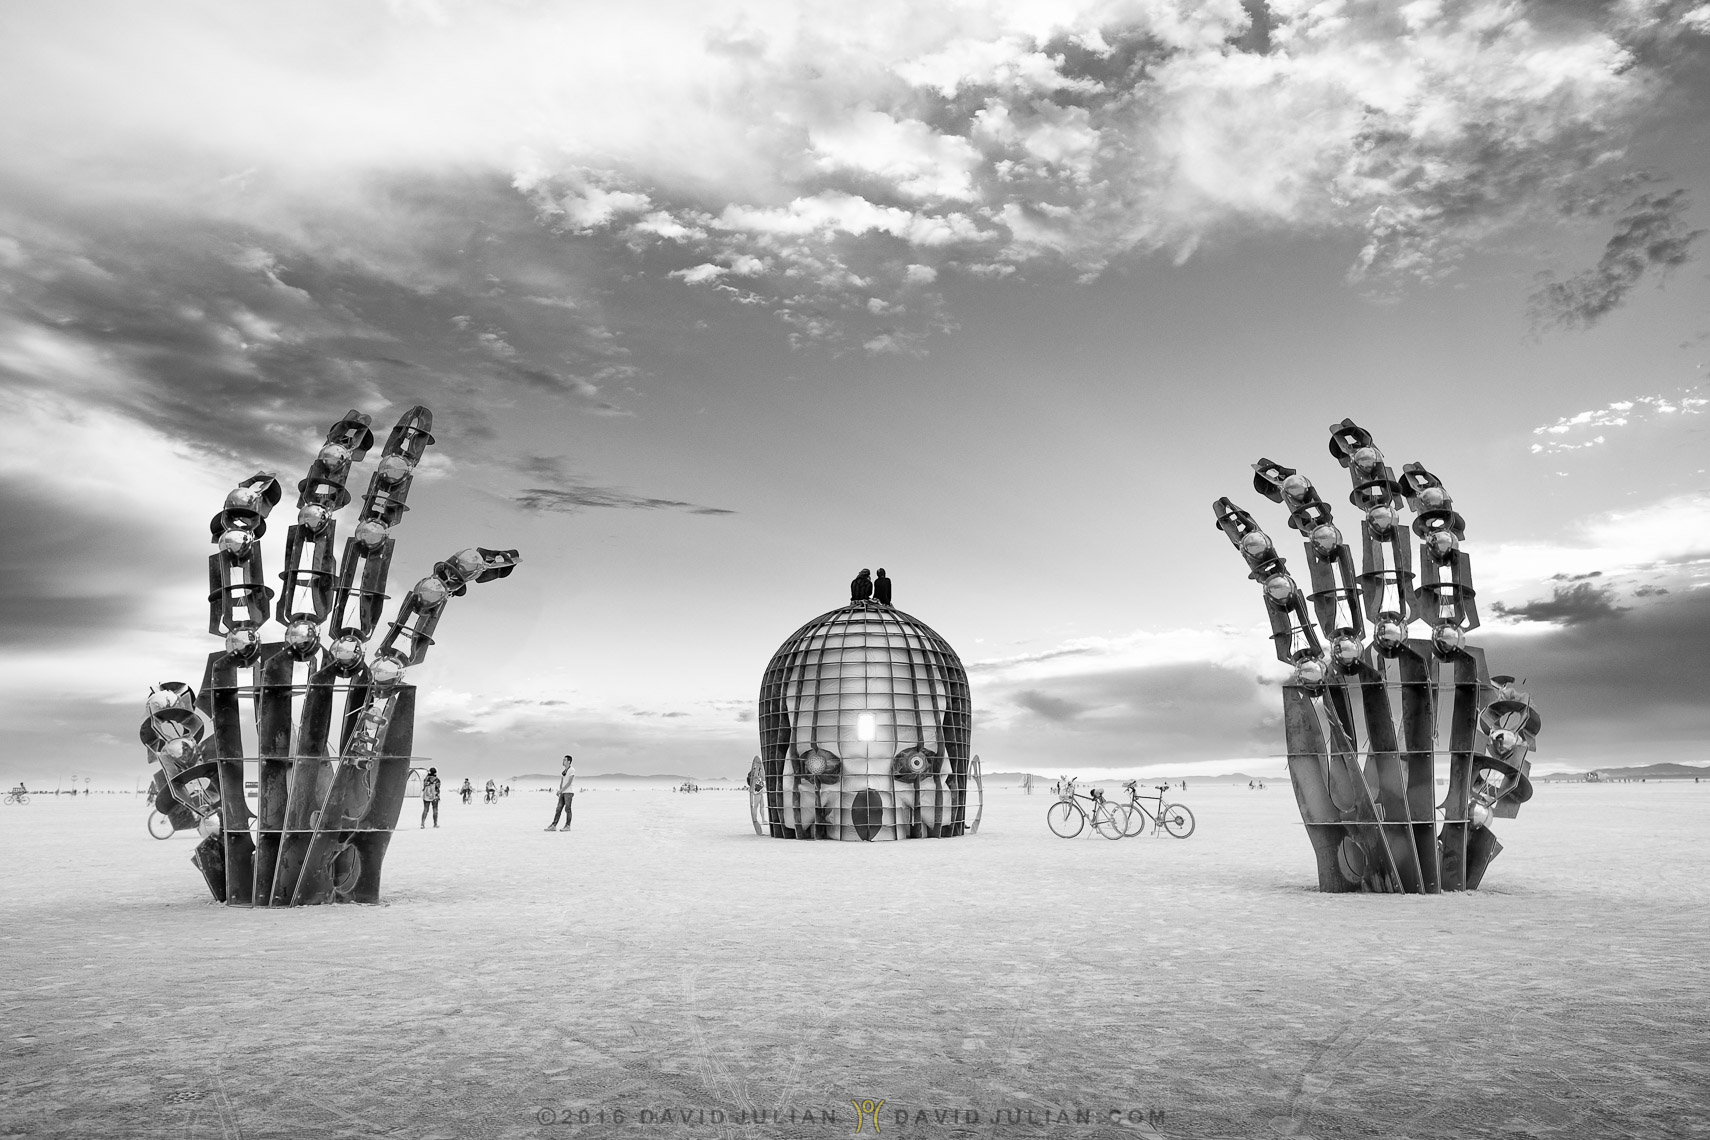
Awakening by Ryan Elmendorf, Nick Geurts. (Fuji X-T1, 16mm WR lens. @ f11)
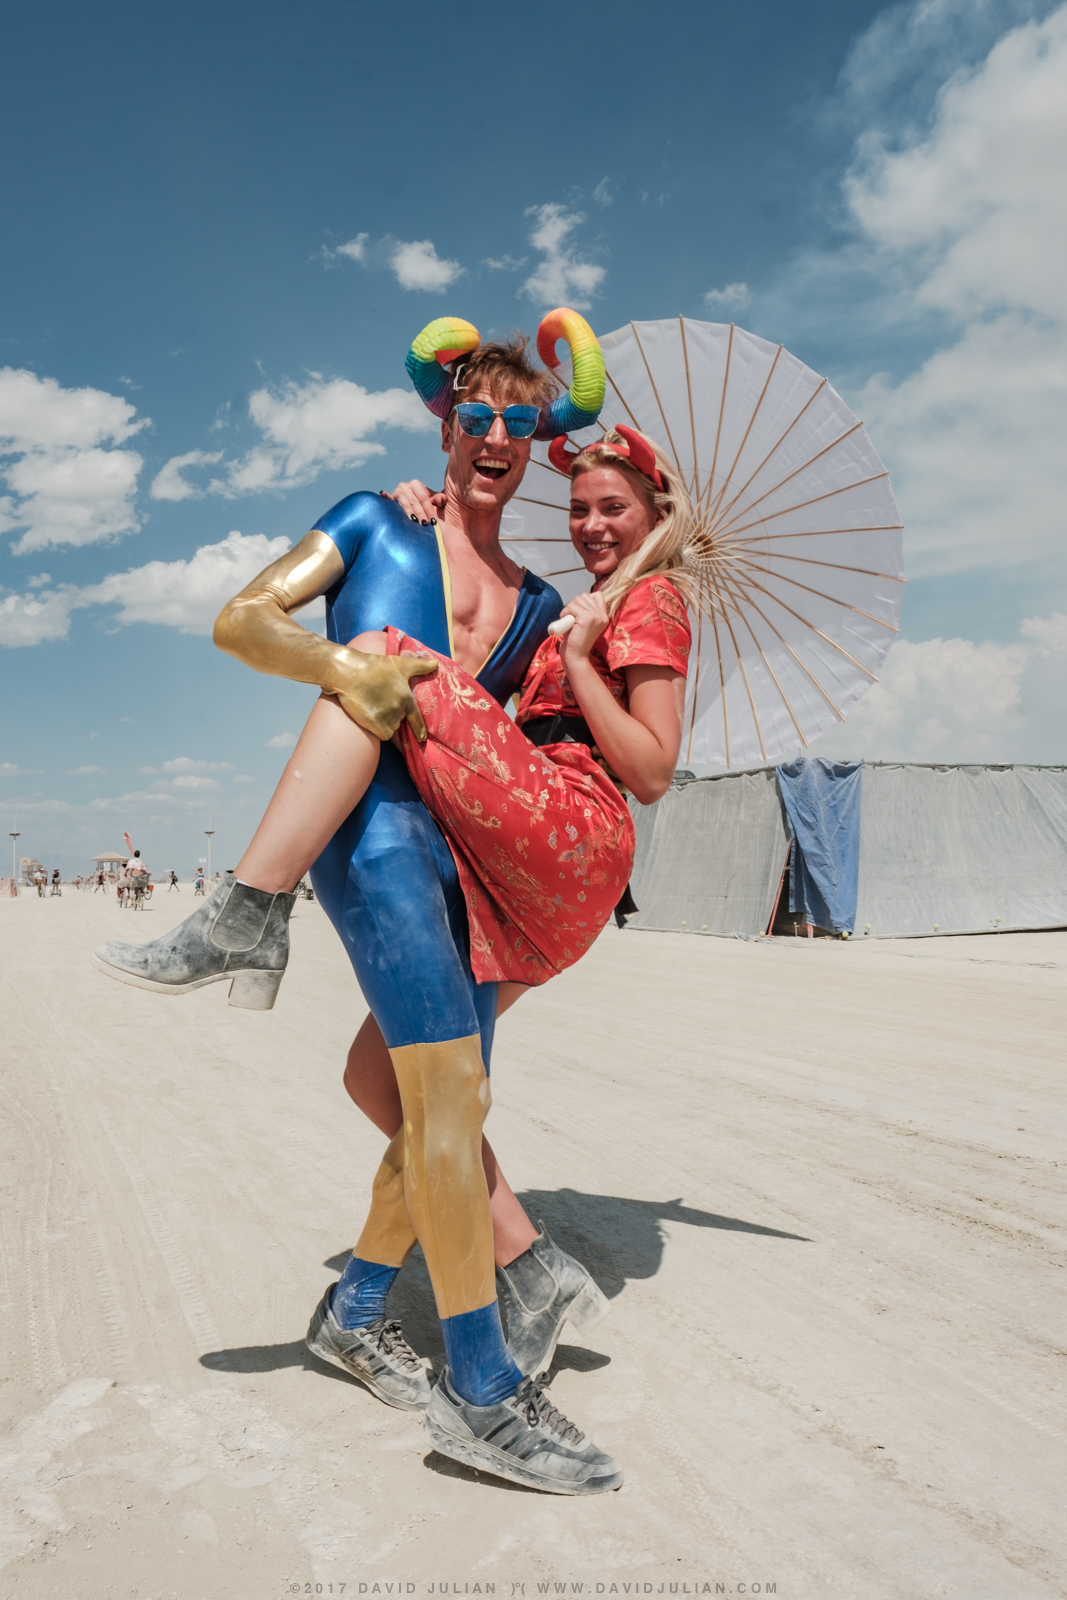
Max and Felicia. (Fuji X-T2, 16mm)
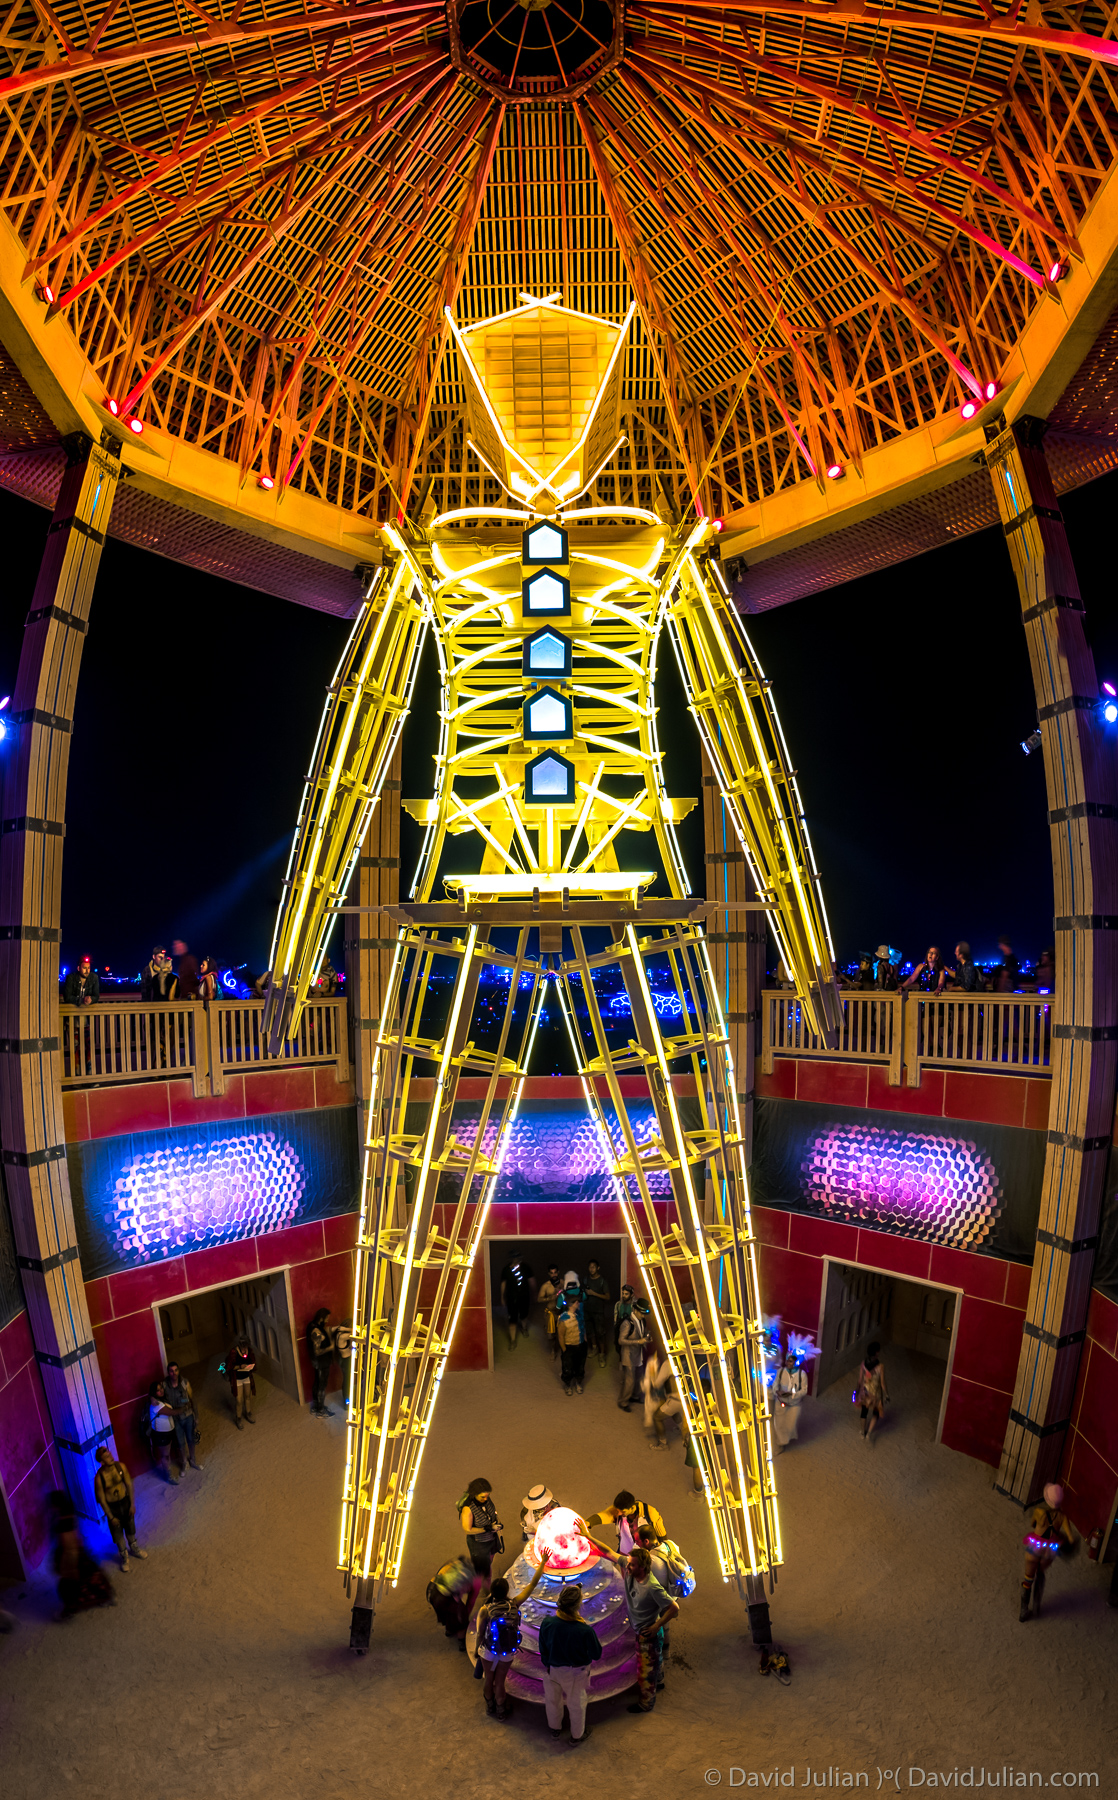
The Man – Burning Man 2017 (Fuji X-T2 16mm stitched vertical panorama)
LENS CHOICES:
My lenses for the Fuji include a Rokinon or Zeiss 12mm, and Fujinon: 16mm WR, 23mm WR, 56mm, 50-140 f 2.8 WR and 1.4x teleconverter lenses. I’d say that more than half my photos are made with the 16mm WR, (= 24mm) because I love the angle of view and because WR means weather resistant. Alkaline dust is corrosive, so great care is taken to protect the gear when out shooting and biking around. I use the prime lenses most of the time, and try to switch them as little as possible. If using Zoom lenses at Burning Man, be sure they are the internally focusing style, not zooms that extend and retract as that will breathe in dust into the mechanism and usually into the camera body. Fuji protects from this by using a sealed rear element. I keep my lenses in Sea to Summit ultralight nylon stuff sacks, nested in my waist pack or messenger bag. This all sounds so bloody complicated but really it’s my travel photography 101: “Protect your gear, and it will serve you well.”
Camera #1: Fuji X-T2 (or newer T3). This is a weather-sealed body and can record an audio clip on any photo during playback. Perfect way to get spoken ID’s of my subjects.
Lenses: My main lens is a Fujinon 16mm f1.4 WR. I keep my 12mm, 23mm and use Fuji’s legendary ultra-soft bokeh 56 f1.2 for portraits, bagged in the nylon bag when not in use. I swap out the 56mm for a compact 55-200mm that really compresses distance nicely.
Camera #2: My Sony compact P.A.S. gets all its function buttons sealed as above, and I made an adapter out of a 2″ PVC pipe fitting that once attached very precisely with duct tape, protects the entire zoom lens and adds a 55-58mm step-up ring to the front. That ring has a Marumi Exus Anti-static Protection filter mounted on it and a metal lens hood. The dust will no longer get sucked into the zoom barrel, and these filters will not attract dust as easily as others. We shall see. The Sony’s lens-adjustment ring still works to control aperture, ISO, or Exp Comp. It squeaks like a little mouse because the control ring’s seam has an elastic broccoli band stretched over it. Awesomely smooth and surprisingly “Playa-proof”. I showed it to a Sony rep and he got quite a kick out of it, making several photos.
iPhone: I still use my iPhone 6s. Damn thing makes great snapshots, adds GPS and can do panoramas, plus HD or slo-mo video. Plus it keeps written logisticand records. data handy. The only thing is the lens is so tiny that even a little dust will render a photograph useless. I’m in the habit of protecting it in a ziplock with a small lens pen. The Body Glove OPTRIX PRO case below is also dust proof and with four different lenses. VERY versatile, lightweight and sealed well. I have used mine only at sea, but it will definitely be on my old iPhone 6s at my next Burn.
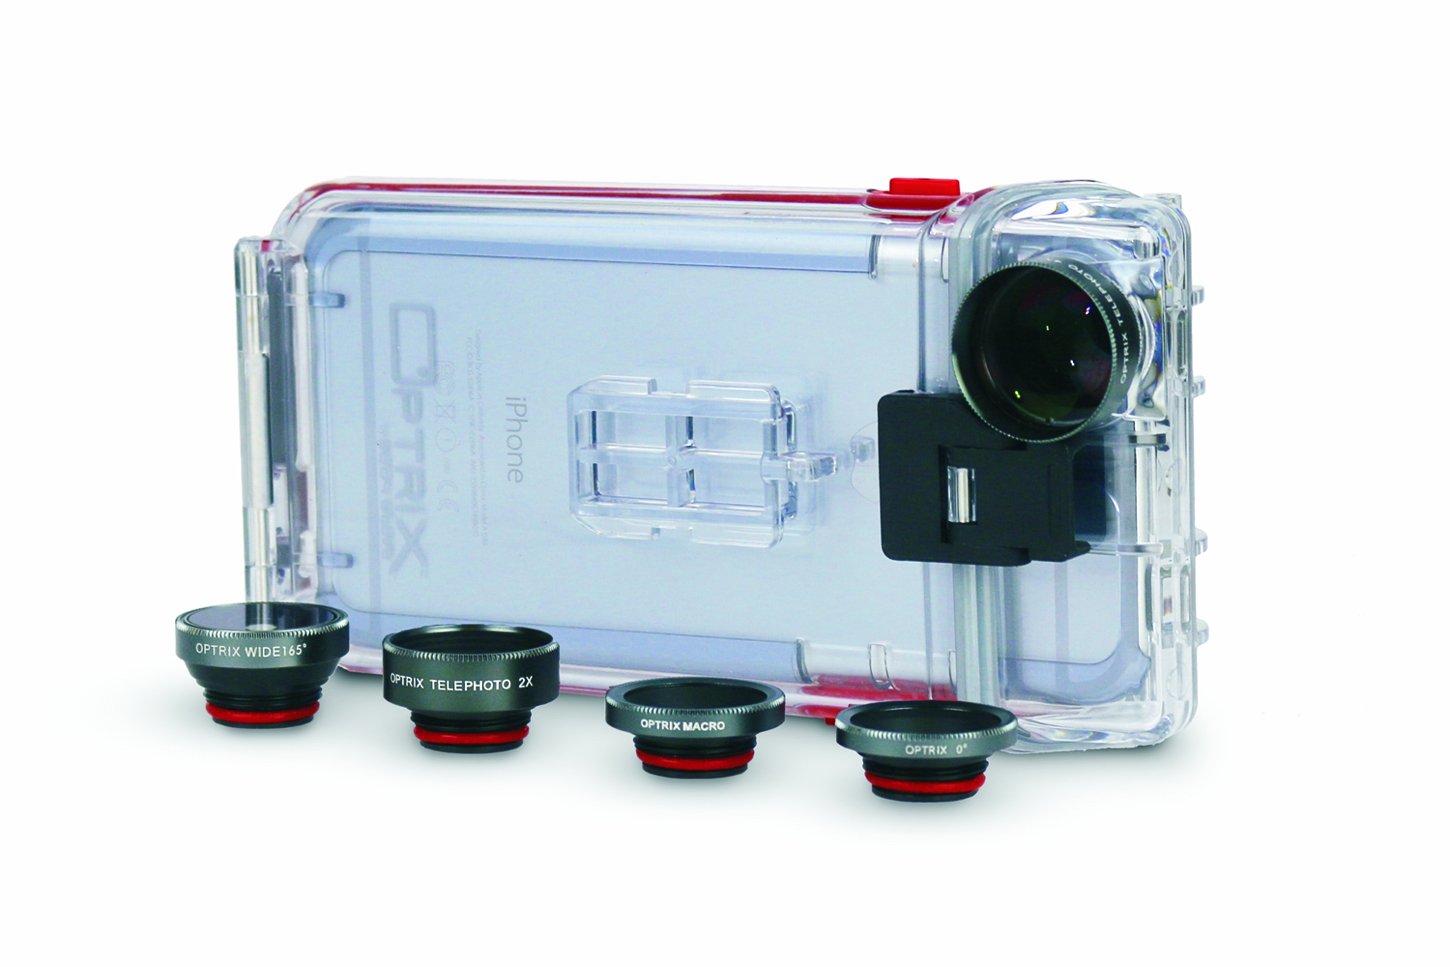
Optrix Pro Kit by Body Glove for iPhone.
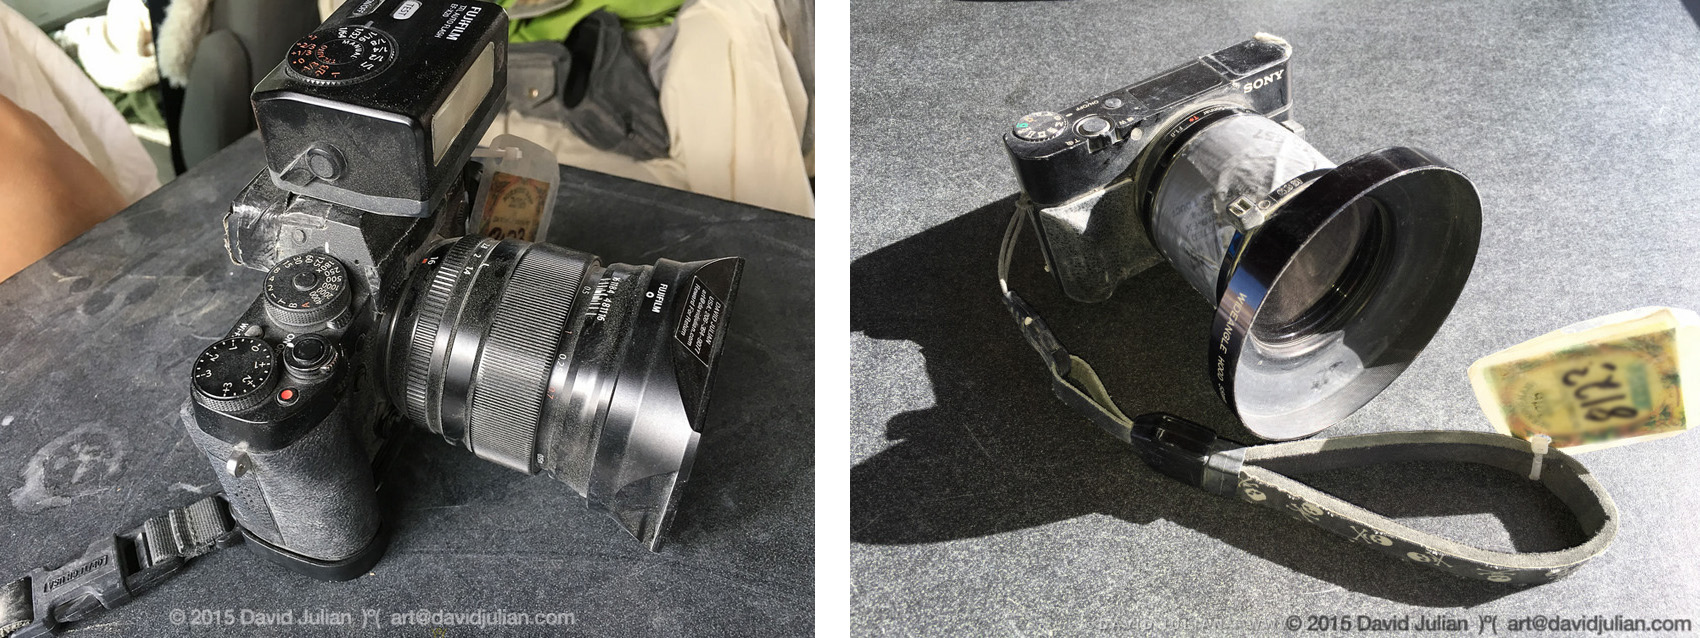
My dusty Fuji and Sony cameras during Burning Man! You see why I do my utmost to prepare and protect them. The duct tape on the Fuji’s viewfinder was to extend it so my dusty forehead would not keep bashing into the flash.
CAMERA PREP:
My Fuji bodies are well-sealed to begin with. I seal all camera body holes, peripheral port doors and buttons with Frost King clear flexible plastic tape or heat-resistant electrician’s tape. Battery access doors get a gaffer’s tape strip with one corner turned in for easy lifting with a fingernail. This keeps dust away from the seal edges. For the Sony, I went even further as detailed below. No matter how well-sealed your camera is, do NOT get it wet unless it’s waterproof. Warn off those well-meaning burners wielding body-cooling spray guns, because wetted playa dust is very corrosive and hard to remove. Or, you could just say ‘screw all this fastidious sh*t!’ and bring just a sport cam like a GoPro.
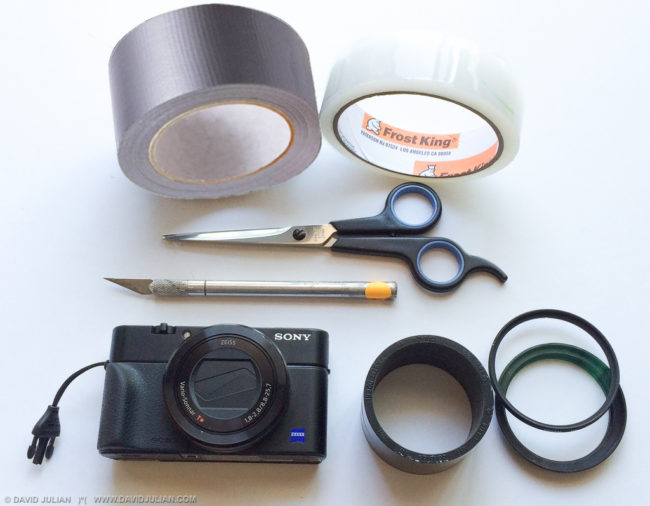
My camera play-proofing protective materials used for the little Sony.
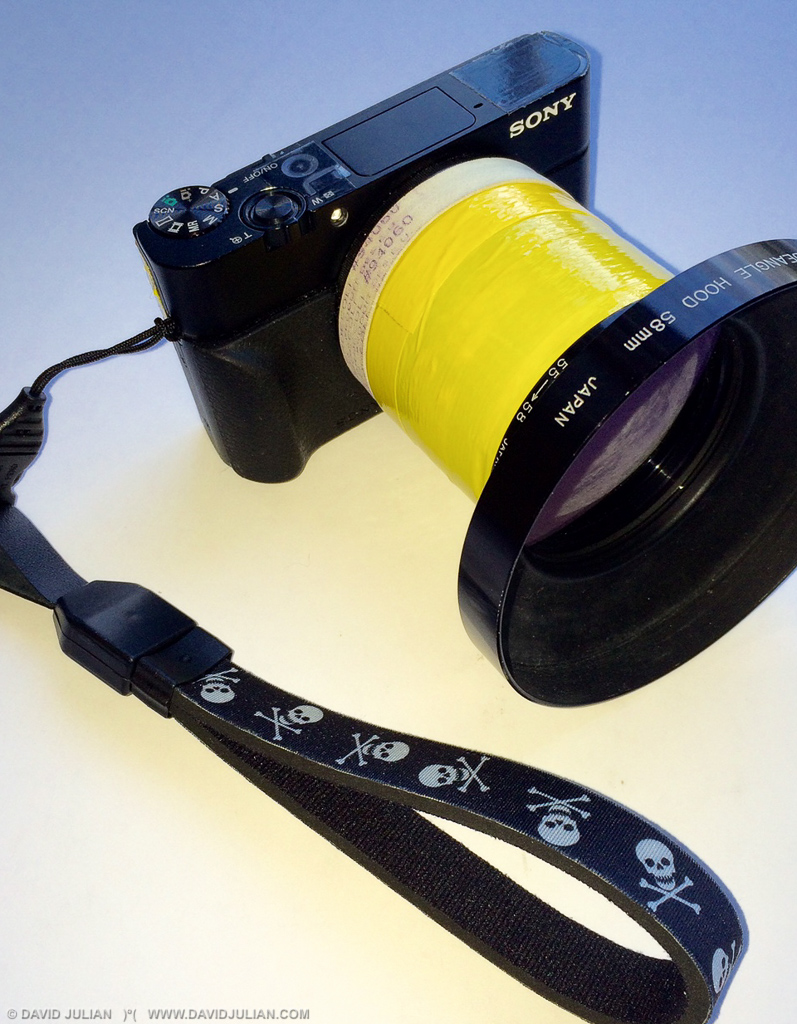
Lil’ Badass: My Sony DMC-RX100III camera play-proofed for Burning Man. Here I used yellow duct tape I had on hand as gaffer’s or vinyl electrical tape comes off in the intense heat of the Playa. Note the clear-tape protected buttons and pop-up viewfinder. Detachable strap is by Optech.
MISC:
Filters: One great accessory I have come to love are anti-static Clear or UV filters by Hoya and Marumi. These are specially coated in a way that the playa dust does not seem to cling as much as it does to conventional glass. Plus, they seal the grit away from your precious optics. People ask me about using Polarizers. I don’t use them to remove reflections on the playa because reflections are naturally dulled back by the fine coating of dust. What that does in effect is make all colors slightly faded in appearance, unless the subject has not been out very long. The best way to recover said lost saturation is in post-processing: Increasing mid-tone contrast via subtle use of Vibrance, Saturation, Clarity, Texture or Dehaze in Lightroom or Camera RAW or whatever software you use.
Cleaning: I deeply reply on using Lens Pens in the field, and my DustOff compressed air can (very, very judiciously) once back in camp. I keep several microfiber cloths in ziplocks for use all week. Once back home, you’ll have to retire them to the household rags collection as Playa never quite washes out enough. Do NOT dust off your gear in your humble desert home, as you will create a cloud of unhealthy air.
Straps: I love love LOVE the Peak Design strap system, because with their patented disc attachment loops, you can swap straps in seconds between bodies. I use their Slide Light, Clutch and Cuff straps. I use Optech neoprene wrist straps in large and small with great results. They unclip from the camera quickly for battery changes, where the Peak strap system with it’s large attachment parts would be overkill. The skull and crossbones pattern on the small comfortable neoprene Optech strap looks badass on my little Sony. I bought the Trio pack because they work so well on my desert drinking cup and other stuff.
Flash: I sometimes use a small flash to fill in the shadows under hat brims and add a little sparkle to dusty skin and clothing. Flash only works when there is hardly dust in the air, which is often in wee hours or dawn when the cooler playa wind is near nil. Otherwise, your photos have a weird glow as if taken during a snowstorm. Tip: If you can see the linear beam of your headlamp, flash won’t work very well. Don’t blind people!
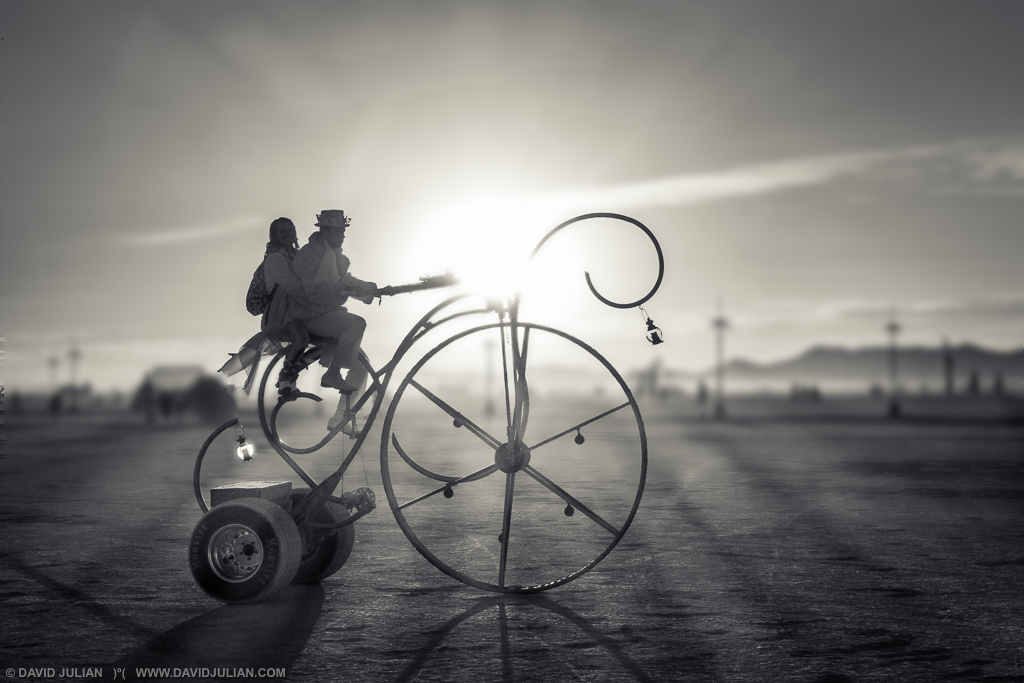
The elegant DreamCycle by Randy Gates just after dawn. (Sony RX100 lll, f2 at 1/500th, used one-handed while biking to keep up with them!)
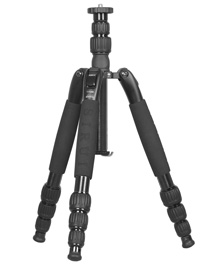 TRIPOD: A tripod is completely optional at Burning Man but I rely on mine quite a bit. At the very least, it insures that I can include myself in group shots. I’ve been taking my carbon fiber Gitzo the past few years, but this year I’ll pack a light and compact Sirui T-104x aluminum tripod that comes with a small but adequate ball head. They have a carbon fiber version, the Sirui T-005x that really saves weight for about $65 more. The even more compact Sirui T-025x is also worth looking into for lighter cameras and toss-in-the-backpack portability. Other models may also be available.
Whatever you bring to Burning Man must be deeply washed and cleaned right after the event. I use vinegar to wash my tripod parts and then soapy water. All good after three burns!
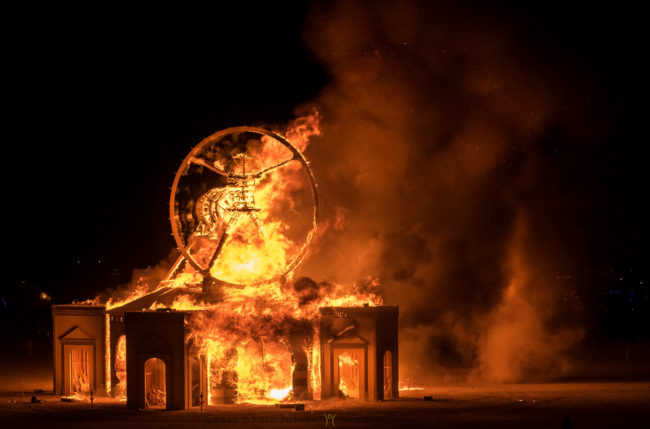
The Man Burns, 2016. You may need to boost ISO and use a large aperture for night shots like this. I used ISO1200.
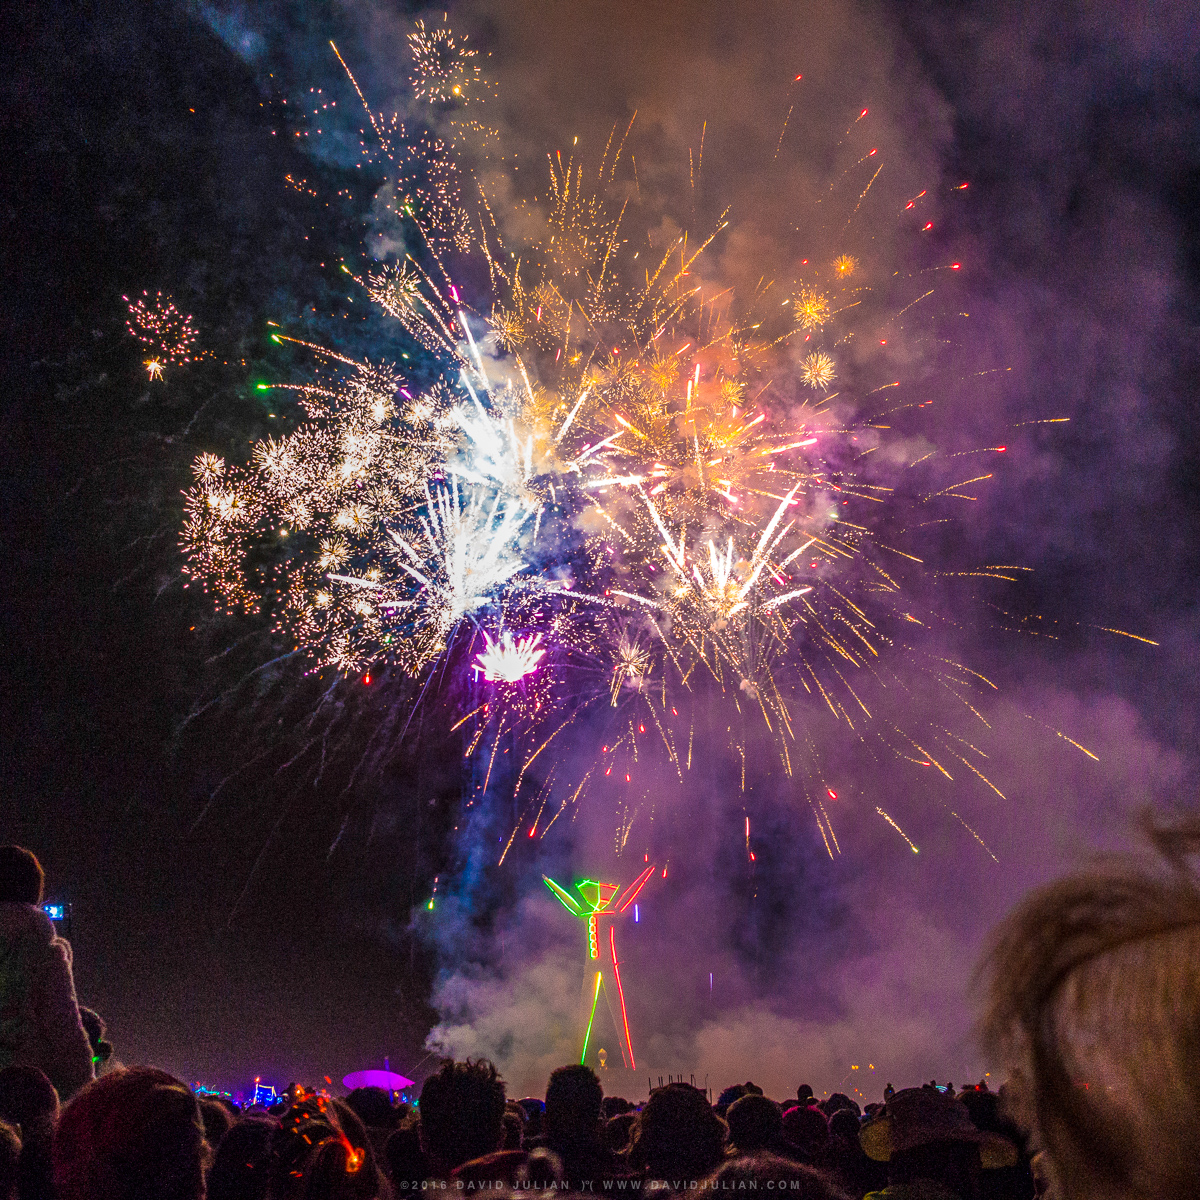
Pre-burn Fireworks, 2015 (Sony RX100lll, f2.8, 1/20 sec)
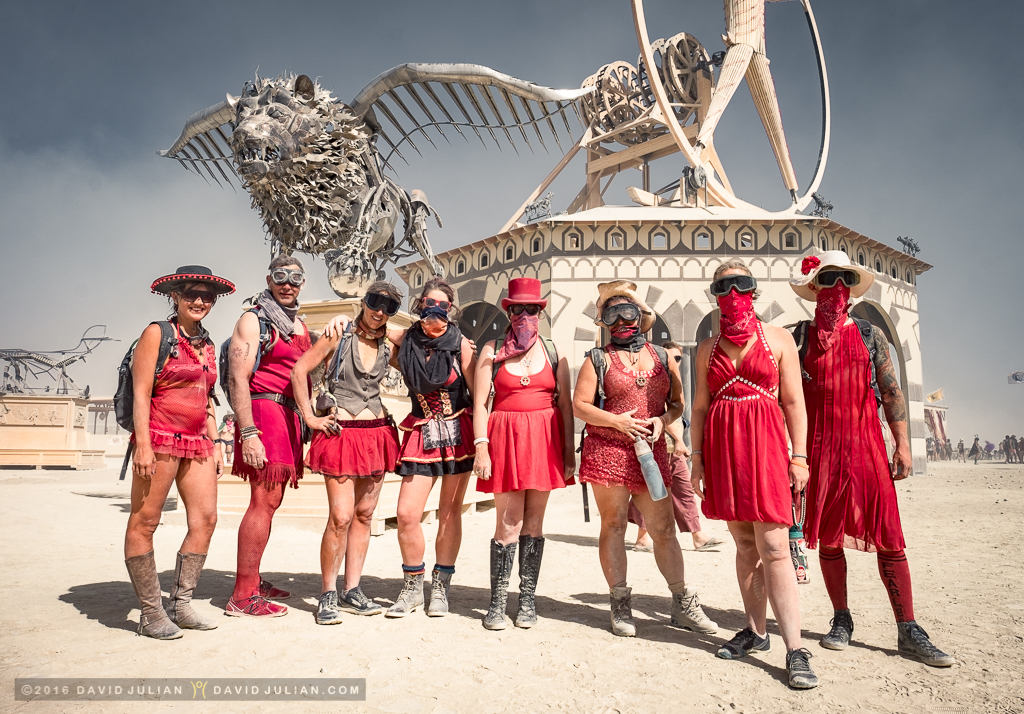
Creative clothing is da bomb at Burning Man (2016) This is why I love the 16mm (24mm) focal length!
CLOTHING:
Creative clothing is one of the ways people express themselves at Burning Man, but truthfully, I have no instinct nor patience for plundering thrift stores to put great outfits together. I choose colorful layers for a climate that can range from as low as 40ºf at night to over 100º with winds from 0 to 30mph. My bike has a set of panniers, so I can add or shed and store layers as needed. I slip a cheap mesh vest over whatever top I am wearing to hold small items, and it is threaded with EL wire and an LED bike flasher so I can be seen when photographing at night. A pair of nylon windproof pants and a light jacket lives in my bike pannier to slip on when needed, and they’ve come in very handy far away from camp when a warm breeze turns into a brisk yet photogenic wind storm.
My night jacket is roomy enough to wear my strapped camera beneath it while I bike around. Don’t forget to bike well lit!
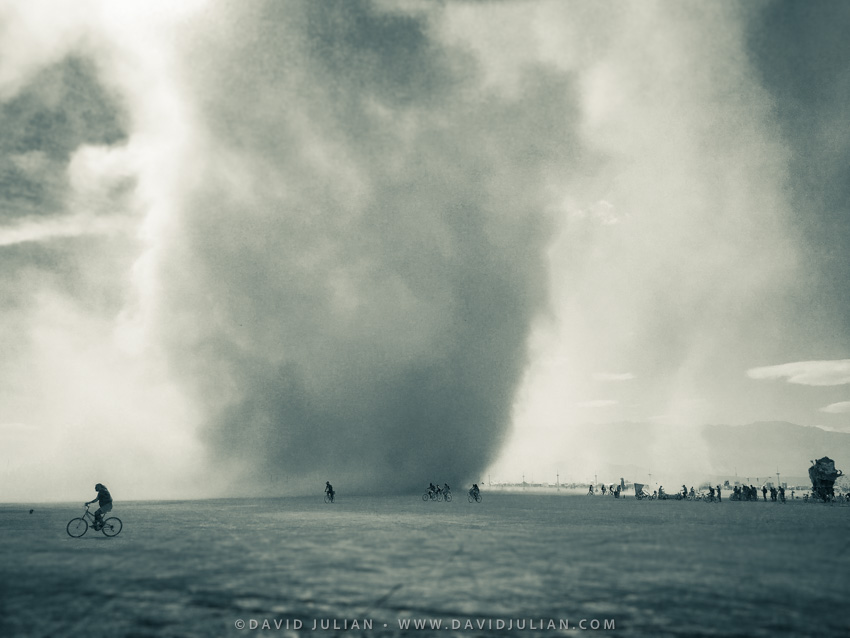
Dust storm at Burning Man. (iPhone 6s)
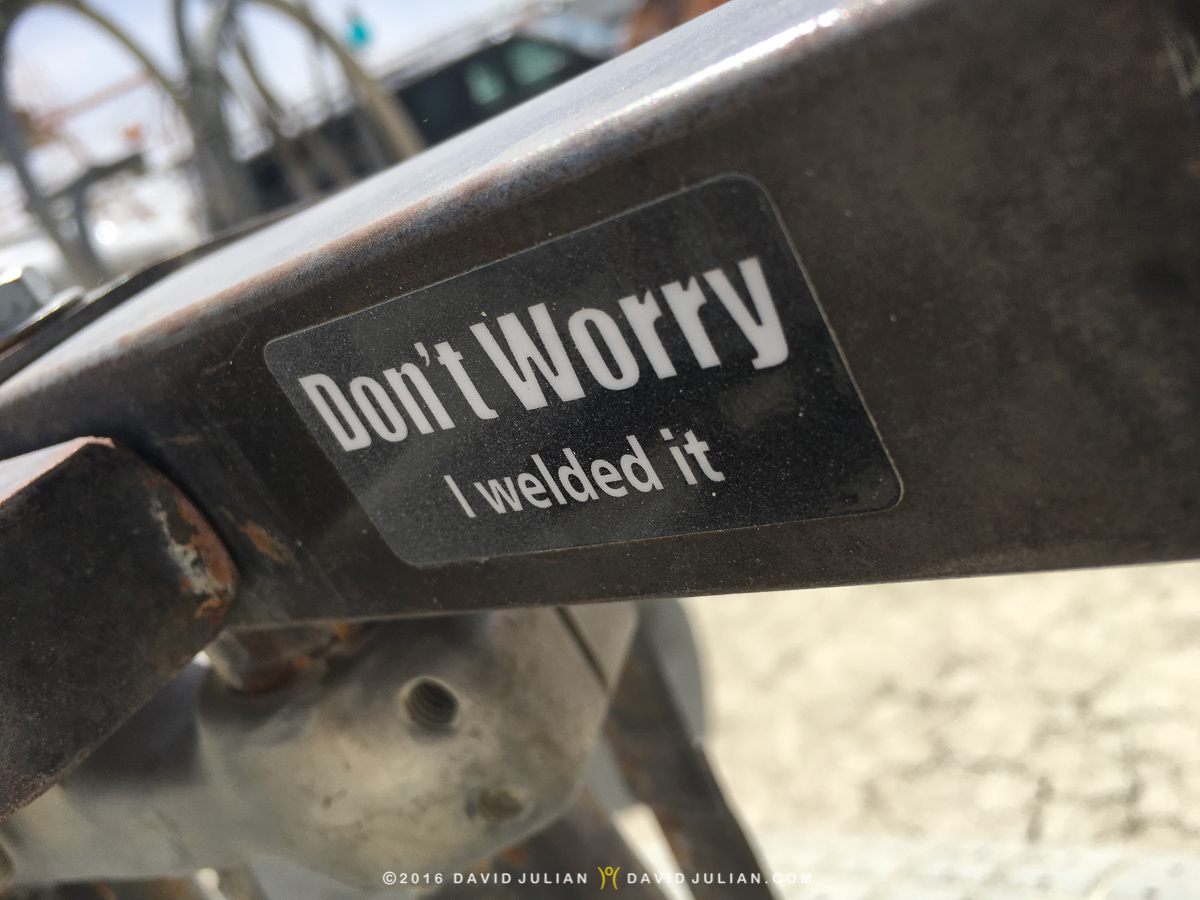
A Burning Man motto is “Safety Third”. I saw a guy climb a structure for a shot. He fell and trashed his wrist (and camera).
SAFETY:
There are a few personal orifices you’ll want to protect at Burning Man: Your mouth, your nose and your eyes. I bought well-fitting Global Vision folding motorcycle goggles for both day and night to protect my eyes from the daily winds of burning playa dust. I sealed up the venting holes with breathable first aid tape. Probably the most crucial part of my kit is a durable and effective dust mask to breathe through because a bandana didn’t cut it. Having had a bad case of Playa Lung that took weeks to heal in 2016, I recently tested five Burner-recommended masks and almost all had at least one problem or another: fit, breathability, comfort, smell, longevity or general shittiness. I finally discovered RZ masks, and tested three of their models. I was very impressed as they have the most comfortable fit and come with extra filters. Their special fastener tabs won’t stick to hair like Velcro does. Their M2 Mesh mask was the most comfortable mask I tested during a 93º 15-mile testing bike ride. It’s improved breathability and lowest heat buildup won my vote for comfort. I’d recommend the M1 neoprene model for colder temps, or for those wanting decorative designs.

Samples of two folding models of Global Vision goggles. I prefer the Adventure models in Clear and Smoke with the softer foam gasket.
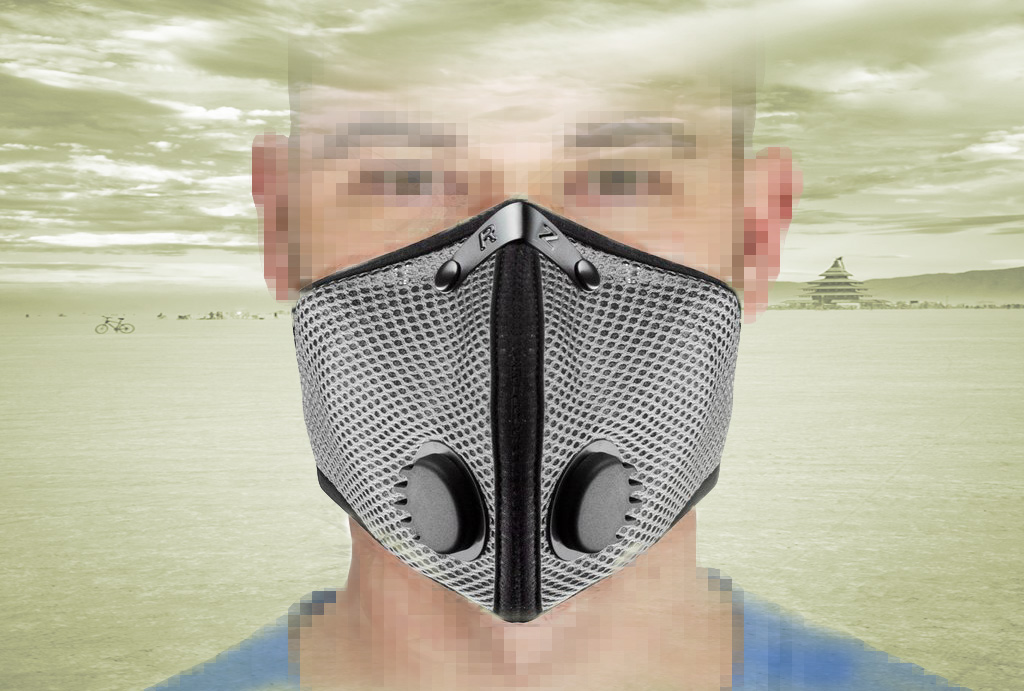
RZ mask model M2 Mesh in Platinum. Comes in several other colors.
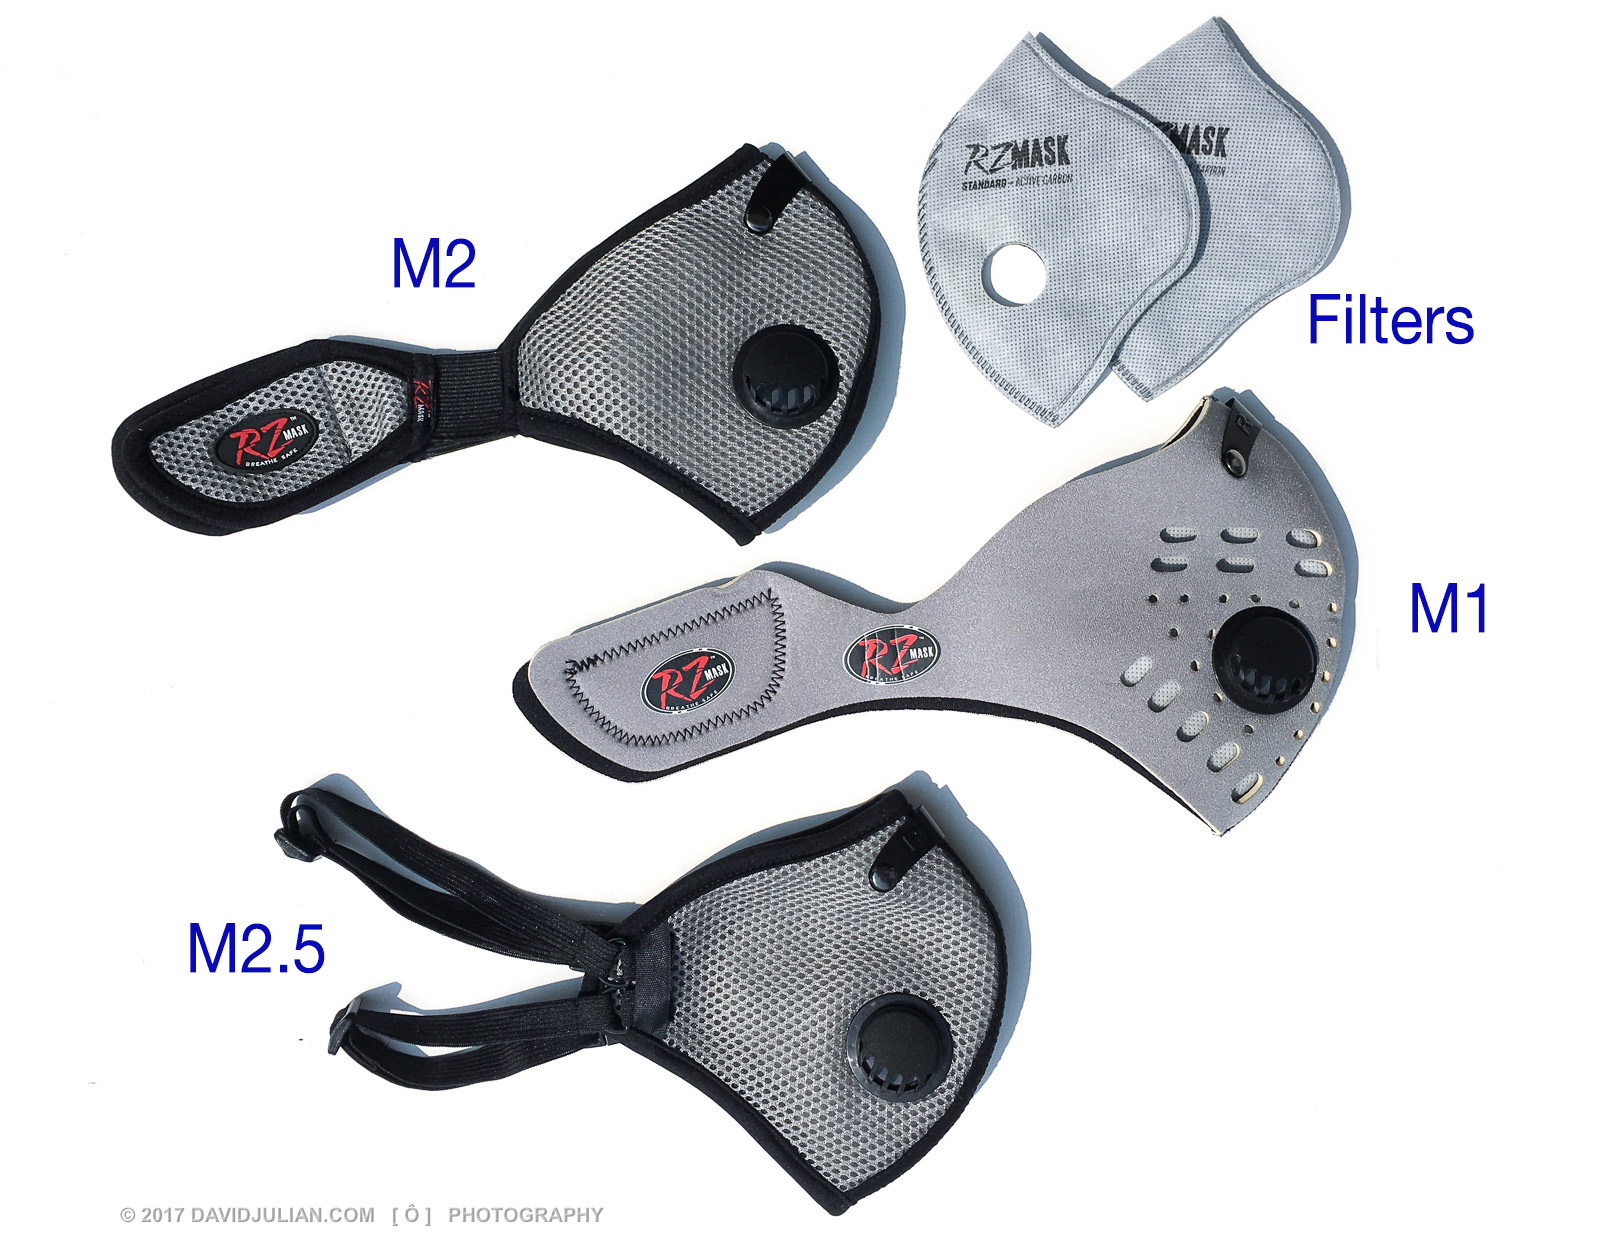
Some Amazon sellers have out of date models. Buy direct from RZ.
A final word here is to put the camera away for at least a few hours each day, and just participate and help create all that Burning Man has to offer.
I hope this post has helped you in some way. Feel free to give me feedback or ask questions below in the comment section. If you want to get more creative in your photography, and post your creative images on a DIY website, have a look at Pixpa.com.
Check out my galleries from the last two burns: Burning Man 2015, Burning Man 2016, Burning Man 2017 and on Flicker at: 2015 , 2016 and at Instagram @davidjulianphotography
If you want help developing your great Burning Man shots, I offer Lightroom Mastery workshops via Skype.
I also sell a $20 set of Lightroom Development presets that turn dull dusty color into the richly-toned images you see above. Email me for info.
Just fill in the blanks to subscribe for more travel stories and techniques in Photography, Lightroom and Photoshop.
I occasionally send out "The Viewfinder" e-newsletter, and provide free presets and workshop discounts.
I never over-post, share your info, and you can opt out at any time.


